Live Conference Manager
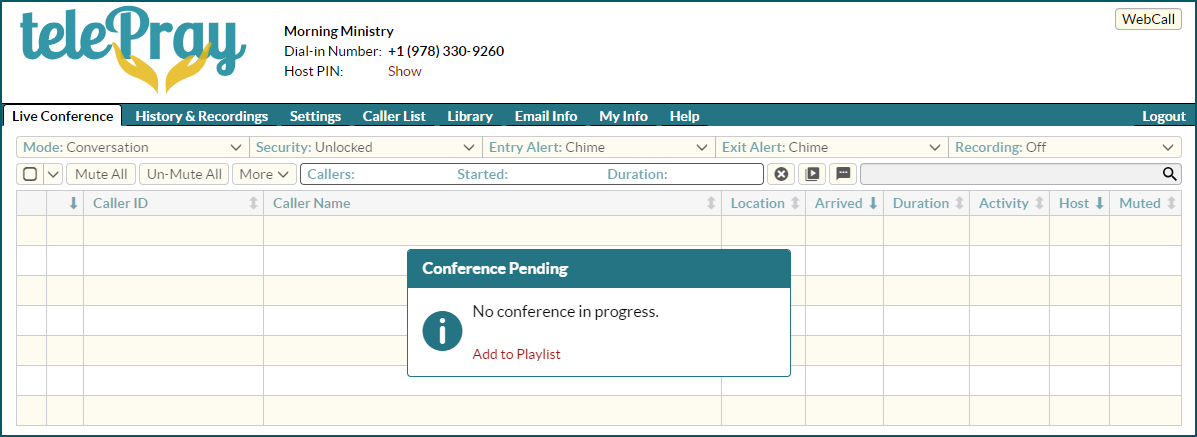
Login to your Account Dashboard at account.telepray.com, using the email address and password you provided when creating your TelePray account. (Guest Hosts login at live.telepray.com, using the TelePray Number and Host PIN.) If no callers have arrived yet, the panel will display a Conference Pending message. You may wish to review your Settings prior to the start of the conference.
Clicking Add to Playlist allows you to select or upload music or a voice recording, placing it into the Playlist in advance of the conference. See Audio Player for more information on playing an audio file into your conference. Any file added to the Playlist will remain available for future conferences until you remove it.

Managing a Live Conference
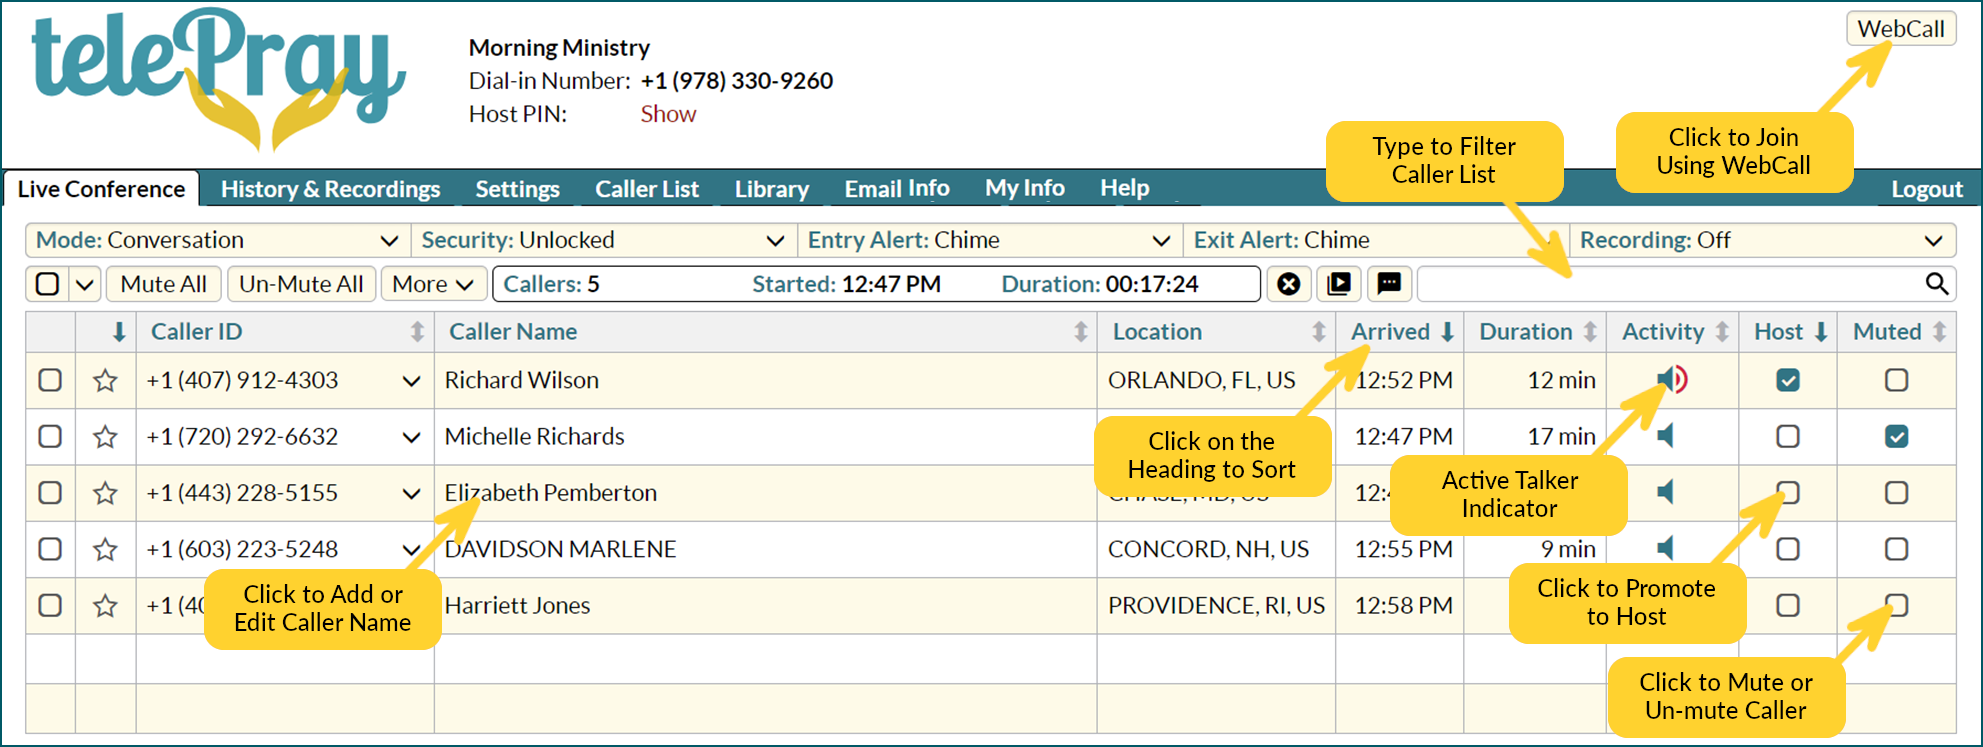
When there is at least one caller connected into the conference bridge, the Live Conference tab displays the caller list along with controls to change the conference settings and participant status. This allows you to mute or un-mute specific callers, assign names to phone numbers, and change many settings for the active conference.

Modify Conference Settings
All conference calls begin with the default feature settings, which can be modified via the Settings tab. The active settings are displayed in the top row. Clicking on a specific setting button triggers a drop-down selection box, allowing you to modify the setting for the active conference call.
- Conference Mode – Controls speaking privileges. See Settings for mode descriptions.
- Security – Locking the conference prevents new callers from joining.
- Entry/Exit Alerts – Announcements that play when callers arrive or depart the conference.
- Recording – Turn recording on or off for the active conference.

Assign Caller Name
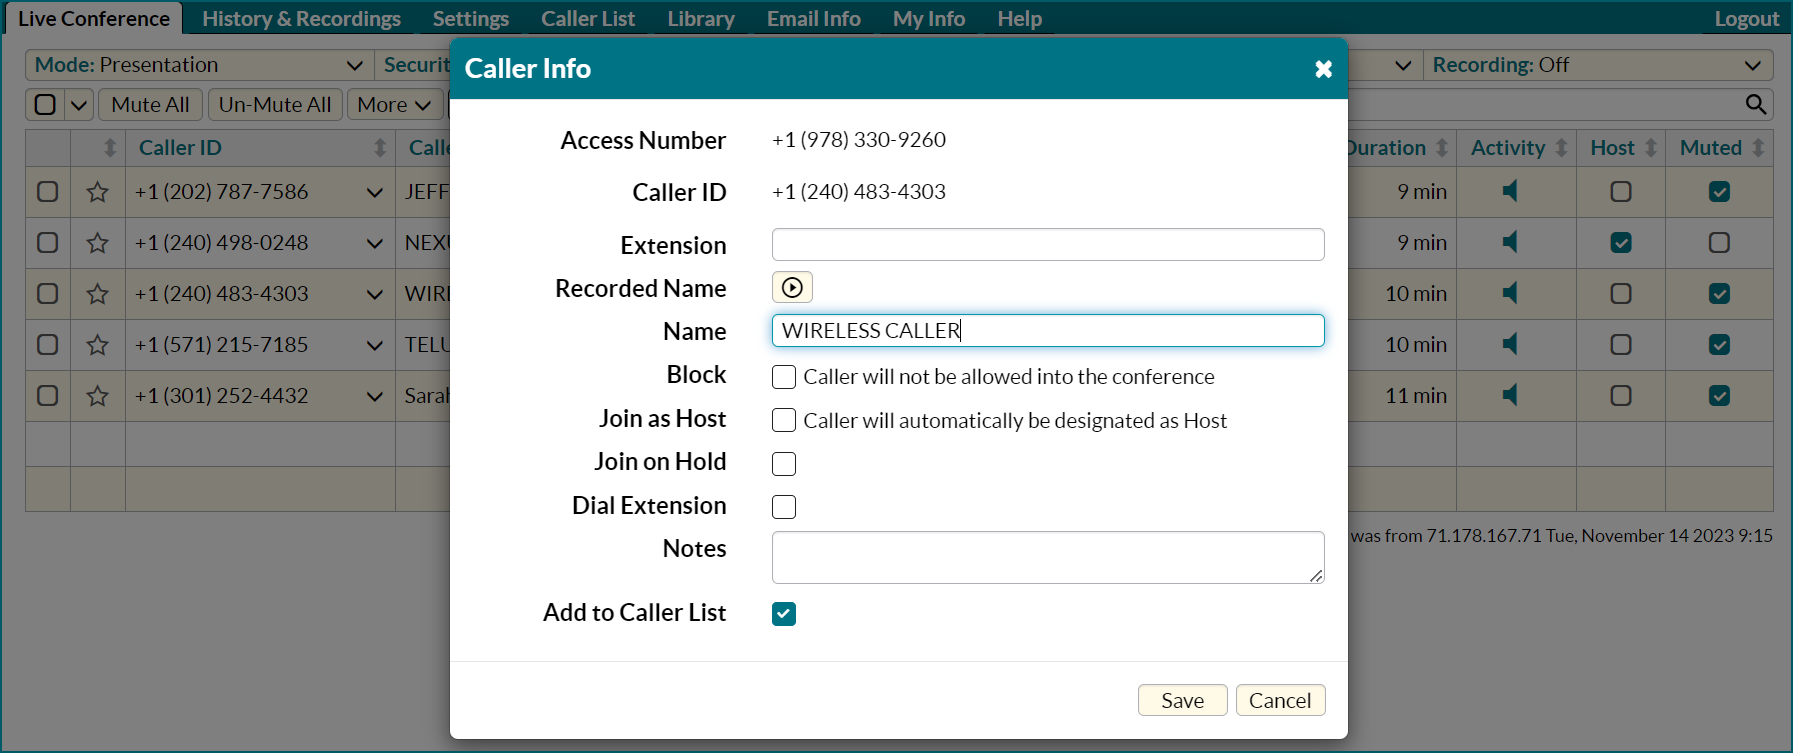
If the caller’s phone number was not previously added to the Caller List, the Caller Name column displays the name provided by the caller’s phone company. Some mobile providers do not provide a name (the field may show “WIRELESS CALLER”). Often, the caller name is displayed with the last name first (e.g., “SMITH SALLY”). The assigned name can be stored in the Caller List.

Apply Actions To Callers
There are multiple options for changing the active status of callers in the conference. For example, you can click on an empty box in the Host column to promote that caller to a Host. The full set of caller actions can be accessed by clicking on the number displayed in the Caller ID column.

- Add Star (Remove Star) – Add Star (Remove Star) - Same as clicking on a blank star icon in the second column.
- Send to Sub Conference – Move caller to a sub conference. (Learn more at Breakout Rooms.)
- Promote to Host – Same as clicking on a blank box in the Host column.
- Mute Caller (Un-mute Caller) – Same as clicking on the box in the Muted column.
- Place on Hold (Take off Hold) – Places caller on music-on-hold, temporarily removing them from active conference.
- Increase Volume – Increases the caller's speaking volume. Repeat to further raise the volume.
- Decrease Volume – Decreases the caller's speaking volume. Repeat to further reduce the volume.
- Drop Caller – Removes the caller from the conference call by terminating the caller's phone connection.
- Add to Caller List – Adds this caller to the stored list accessible via the Caller List tab.
Apply Actions To Multiple Callers
You can use the first column to select multiple callers and simultaneously apply an action to them. For example, you can select some of the participants and temporarily place them on hold, while the remaining participants engage in a private conversation. Click on one or more of the checkboxes in the left column, then click on the More button to choose the action to apply to the selected callers. In the example below, the host first checks the boxes associated with two of the callers, and then clicks on the More button, which will apply the same action to both callers.

In this example, Place on Hold was selected, and the panel display indicates the revised caller status in the Activity column.

Using the Star Column
You can “flag” a participant by clicking the corresponding star icon in the second column. This allows you to keep track of certain callers during a conference. If you sort the callers by that column, the starred participants will persistently be listed at the top of the caller list display.

Other Actions Using the Live Conference Panel
You can mute or un-mute all non-hosts using the second-row buttons. (These actions only apply to active participants. New participants will be muted or un-muted based on the Conference Mode.)

Filtering the List of Callers
You can use the Filter Box to isolate specific participants in your conference. The filter will display matches from the Caller ID, Caller Name or Location columns, and remove other participants from the list of active participants. This has no impact on the conference itself, but allows you to find specific callers in the list.

Recording Caller Names
If the setting Prompt Callers For Name is turned on in Settings, callers will be prompted to record their name when joining the confernece. You can listen to these name recordings by clicking on the Play icon  in the panel. (These play privately on your device, not into the conference.) You can use this feature to assign or edit the name that is displayed in the Caller Name column. If a name recording is available, you can click on the name displayed in the panel to bring up the Caller Info box which allows you to play the recording and modify the name associated with this caller.
